

I had the opportunity to make this beautiful, tiny, Princess Aurora dress for my niece's 3rd birthday. When I make costumes, my goal is always to make a high-quality and screen-accurate product.


I'll share some tips & techniques I used to make this cute little gown...
GENERAL:
I used the Simplicity 2569 pattern as a base pattern for the dress, although I made quite a few modifications.

BODICE:
I changed the waistline from going straight across to more of a v-shape like Aurora's dress. I also divided bodice front into 4 pattern pieces in order to make the 3 seams you see on the front. I traced the original pattern onto tissue paper and made modifications on there. I tried out the pieces using cheap fabric (formerly curtains) to make sure everything would work, before I cut out the real fabric.


SKIRT & PEPLUM:
I made the skirt & lining according to the pattern directions. However, when I attached the skirt to the bodice (after basting on the peplum), I sewed the front bodice lining to the skirt. I wanted the bodice front to lay on top of the skirt to show off the v-shape.I created the peplum from scratch. I used a bowl to draw a rounded waist edge, then drew the shape I estimated that the peplum should be. I (again) tested my pattern on the cheap curtain fabric and by some miracle was successful on the first try! So I cut the fabric & lining, sewed them together, then attached to the skirt.


SLEEVES:
I bought a stretchy mesh fabric similar to that worn by Aurora in Disney Parks for the sleeves. However, I used a darker pink to match the bodice & skirt which is more like what you see Aurora wear in the Sleeping Beauty movie. Usually this fabric is found with the swim/dance fabrics. It's more durable than most netting-type fabrics and has a lot of stretch. This allows you to make a tighter-fitting sleeve without restricting movement.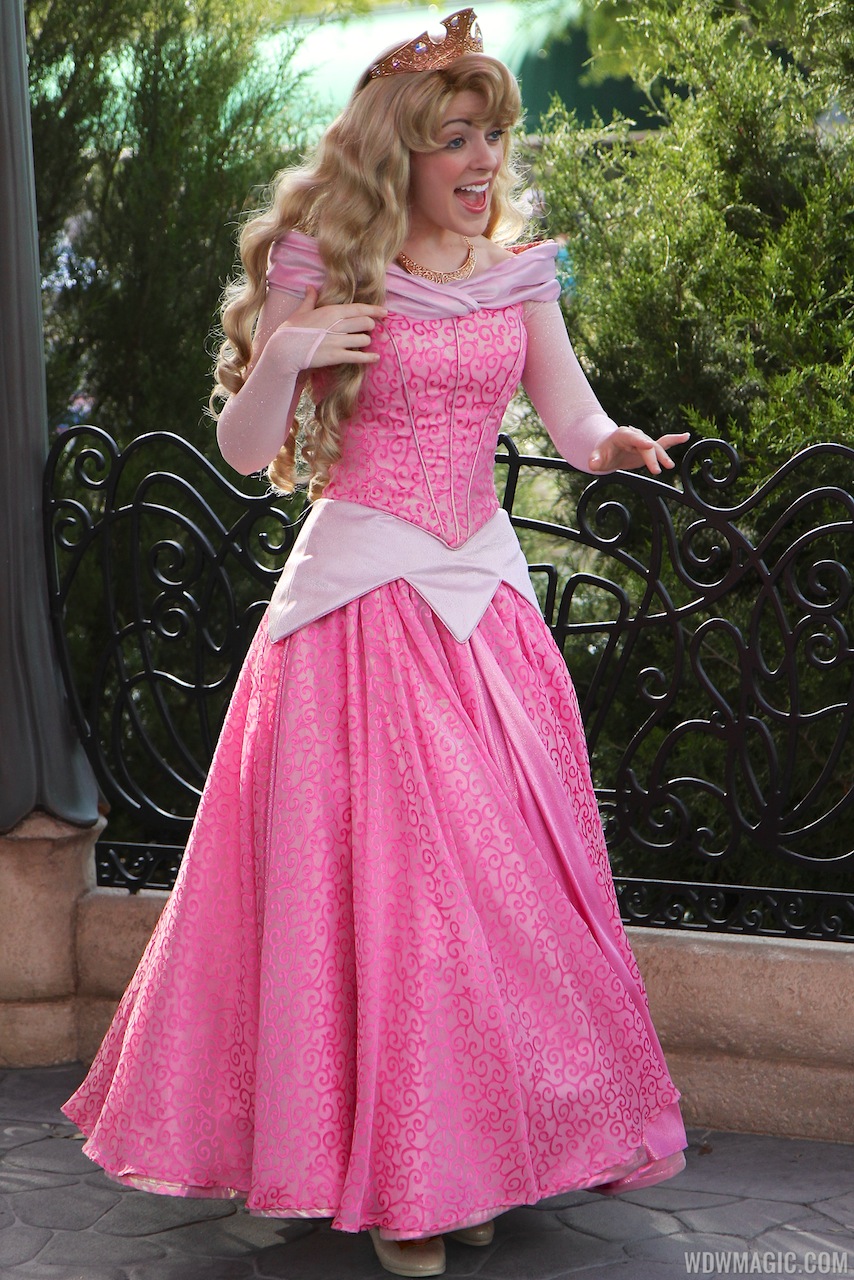

Because this fabric is stretchy, be sure to use a ziz-zag or other stretch stitch to allow stretch without breaking the thread. I added a little v-shape to the cuff of the sleeve, and sewed a thin elastic to the point so it would fit like Disney Parks' Aurora. After attaching the sleeve to the bodice, I didn't want the seam allowance to show through the sheer sleeve. So I used some bias tape as binding around the seam allowance. Hopefully this will give more strength to the seam as well.


SHOULDER DETAIL:
Again, I used the (new) Disney Parks Aurora dress as a reference for the should detail. I used the same fabric that I used for the peplum. I cut a long rectangle, then pressed horizontal folds into the fabric. I used lightweight fusible interfacing to give structure to the piece, then sewed the long edges together.


I folded at a diagonal near the center of this strip, then pressed. I placed this section at the center-front neckline, then hand-stitched along the fold. I hand-tacked the rest of the shoulder detail in place about every 2 inches around the shoulder and back neckline.


TIARA HEADBAND:
I had some excess gold spandex fabric from a Princess Jasmine costume that I made. I used this, some craft foam, and a headband to made a little tiara. I drew out the shape of the crown, then traced this onto the fabric & craft foam. I sewed the gold fabric, right-sides together. Then I slipped the fabric over the craft foam & glued this to the headband. I used hot glue & a gold sequin trim (also extra from my Jasmine costume) to cover the rest of the headband, although I probably would've preferred ribbon.


The hours working on this really paid off! The birthday girl LOVED it and I learned a lot too! Any questions? Leave them in the comments below!

No comments:
Post a Comment